Facebook Data Analysis Using R
Hey Folks, Today We gonna Learn to Analyse Facebook Data using R .
Before Going to concept, makesure you Have R Installed in your System, If Not Proceed the Following Steps to Install.
Step 1 – Install R
1. Download the R installer from: https://cran.r-project.org/
2. Run the installer. Default settings are fine. If you do not have admin rights on your laptop, then ask your local IT support. In that case, it is important that you also ask them to give you full permissions to the R directories. Without this, you will not be able to install additional packages later.
Step 2 – Install RStudio
1. Download RStudio: https://www.rstudio.com/products/rstudio/download/
2. Once the installation of R has completed successfully (and not before), run the RStudio installer.
3. If you do not have administrative rights on your laptop, step 2 may fail. Ask your IT Support or download a pre-built zip archive of RStudio which doesn’t need installing.
a. Download the appropriate archive for your system (Windows/Linux only – the Mac version can be installed into your personal “Applications” folder without admin rights).
b. Double clicking on the zip archive should automatically unpack it on most Windows machines.
Step 3 – Check that R and RStudio are working
1. Open RStudio. It should open a window .
2. In the left hand window, by the ‘>’sign, type ‘4+5’(without the quotes) and hit enter. An output line reading ‘[1] 9’ should appear. This means that R and RStudio are working.
3. If this is not successful, contact us or your local IT support for further advice.
That’s it, let’s get started!
Code:
> install.packages("devtools")
> library(devtools)
> install_github("Rfacebook","pablobarbera",subdir = "Rfacebook")
> require(Rfacebook).
2. Connecting to the Facebook API via App:
First we have to create an App on the Facebook platform. We will use this app to connect to the Facebook API. This way you can manage your connections very good but it also has some disadvantages.you can Connect to Friends in a network only who use this app.


Apply the changes with “Create App ID“.

The console will then print you the message:
Note: Copy and paste into Site URL on Facebook App Settings: http://localhost:1410/
When done, press any key to continue...
Waiting for authentication in browser...
Press Esc/Ctrl + C to abort
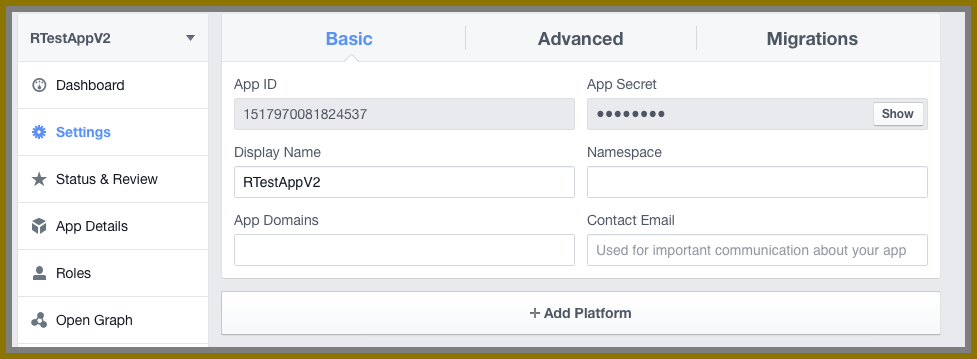
Copy the URL and go to the settings of your Facebook app. Click on the settings tab on the left side and then choose “+ Add Platform“.
Then add the URL in the field “Site URL” and save the changes.


> save(fb_oauth,file = "fb_oauth")
> load("fb_oauth")
Now we saved our own public information in the variable „me“ and you can take a look at it.

> ##### access token will be changing for every time
access_token="EAAOm4fD2I7YBAGG5x2ULBhIX7kxrYh4sYjZCRuth8qKIyatbPwiA44ItWEb1oRBg8T7us4xyJ5xMULGlesAnCoNxiBuZB7KT74mdPHbeDTWfZBBUQbF4ndScbkYGVd3awiUs5DDrX5ROJsfOrEbwXtyayanSvfJH9QD2rQVvBDIB7StEXDZA1OD1NumunakZD"
#Note:You Have to Paste Your Access Token that is being Displayed in your app.
> myFb=getUsers("me",token = access_token)
> myFriends = getFriends(access_token,simplify = FALSE)
> myFriends_info <- getUsers(myFriends$id, token=access_token, private_info=TRUE)
> table(myFriends_info$ relationship_status)
myFriendsNetwork1 = getNetwork(access_token, format = "edgelist", verbose = TRUE)
myFriends_info <- getUsers(myFriends$id, token=access_token, private_info=TRUE)
table(myFriends_info$ relationship_status)
View(myFriendsNetwork1)
install.packages("igraph")
library(igraph)
g1 <- graph(myFriendsNetwork1)
plot(g1)
That's it !! ...Start Analysing and have fun !!!
Thanks,
Have Fun!!!!
Please Leave your Comment Below If you Have Any Clarifications Regarding Installations or Any Suggestions.
Before Going to concept, makesure you Have R Installed in your System, If Not Proceed the Following Steps to Install.
Step 1 – Install R
1. Download the R installer from: https://cran.r-project.org/
2. Run the installer. Default settings are fine. If you do not have admin rights on your laptop, then ask your local IT support. In that case, it is important that you also ask them to give you full permissions to the R directories. Without this, you will not be able to install additional packages later.
Step 2 – Install RStudio
1. Download RStudio: https://www.rstudio.com/products/rstudio/download/
2. Once the installation of R has completed successfully (and not before), run the RStudio installer.
3. If you do not have administrative rights on your laptop, step 2 may fail. Ask your IT Support or download a pre-built zip archive of RStudio which doesn’t need installing.
a. Download the appropriate archive for your system (Windows/Linux only – the Mac version can be installed into your personal “Applications” folder without admin rights).
b. Double clicking on the zip archive should automatically unpack it on most Windows machines.
Step 3 – Check that R and RStudio are working
1. Open RStudio. It should open a window .
2. In the left hand window, by the ‘>’sign, type ‘4+5’(without the quotes) and hit enter. An output line reading ‘[1] 9’ should appear. This means that R and RStudio are working.
3. If this is not successful, contact us or your local IT support for further advice.
That’s it, let’s get started!
Code:
- First we need to install the packages devtools and Rfacebook from github as this is currently the most recent version.
> install.packages("devtools")
> library(devtools)
> install_github("Rfacebook","pablobarbera",subdir = "Rfacebook")
> require(Rfacebook).
2. Connecting to the Facebook API via App:
First we have to create an App on the Facebook platform. We will use this app to connect to the Facebook API. This way you can manage your connections very good but it also has some disadvantages.you can Connect to Friends in a network only who use this app.
To create a new app go to https://developers.facebook.com
Click on “Apps” and choose “Add a New App“. In the next window choose “Website” and give your app a fancy name.
Apply the changes with “Create App ID“.
Welcome to your first own Facebook app!
Ok now we need to connect our R session with our test app and authenticate it to our Facebook Profile for Data Mining. Rfacebook offers a very easy function for that.
Just copy your app id and your app secret from your app settings on the Facebook developer page.
> fb_oauth<-fbOAuth(app_id = "1027914270647222", app_secret = "2ba1b1c85c98b02b381282c0f4c178a0",extended_permissions = TRUE)The console will then print you the message:
Note: Copy and paste into Site URL on Facebook App Settings: http://localhost:1410/
When done, press any key to continue...
Waiting for authentication in browser...
Press Esc/Ctrl + C to abort
Copy the URL and go to the settings of your Facebook app. Click on the settings tab on the left side and then choose “+ Add Platform“.
Then add the URL in the field “Site URL” and save the changes.
Go back to your R session and hit enter. Then a browser window should open you have to allow the app to access your Facebook account.
If everything worked the browser should show the message
Authentication Complete...Please Close this Page and return to R.
And your R console will confirm it with
> load("fb_oauth")
Analyze Facebook with R!
Now we connected everything and have access to Facebook. We will start with getting our own profile information.
As I mentioned before because of Facebook´s new API policies the information you can get is very limited compared to the amount you were able to download with apps using API 1.
So I will just show you now how to get your own personal information but other posts will follow with new use-cases of the new API version.
The getUsers function returns public information about one or more Facebook user. If we use “me” as the username argument, it will return our own profile info.
> me <- getUsers("me",token=fb_oauth)Now we saved our own public information in the variable „me“ and you can take a look at it.
Connecting to the Facebook API via Authentication Token:
The connection via an manually created authentication token has some less restrictions and so you can get more data. However, this token is only valid for 2 hours.
You can create your token at https://developers.facebook.com/tools/explorer
access_token="EAAOm4fD2I7YBAGG5x2ULBhIX7kxrYh4sYjZCRuth8qKIyatbPwiA44ItWEb1oRBg8T7us4xyJ5xMULGlesAnCoNxiBuZB7KT74mdPHbeDTWfZBBUQbF4ndScbkYGVd3awiUs5DDrX5ROJsfOrEbwXtyayanSvfJH9QD2rQVvBDIB7StEXDZA1OD1NumunakZD"
#Note:You Have to Paste Your Access Token that is being Displayed in your app.
> myFb=getUsers("me",token = access_token)
> myFriends = getFriends(access_token,simplify = FALSE)
> myFriends_info <- getUsers(myFriends$id, token=access_token, private_info=TRUE)
> table(myFriends_info$ relationship_status)
myFriendsNetwork1 = getNetwork(access_token, format = "edgelist", verbose = TRUE)
myFriends_info <- getUsers(myFriends$id, token=access_token, private_info=TRUE)
table(myFriends_info$ relationship_status)
View(myFriendsNetwork1)
install.packages("igraph")
library(igraph)
g1 <- graph(myFriendsNetwork1)
plot(g1)
That's it !! ...Start Analysing and have fun !!!
Thanks,
Have Fun!!!!
Please Leave your Comment Below If you Have Any Clarifications Regarding Installations or Any Suggestions.


Thanks for sharing this Information. Data Science Training Course in Gurgaon
ReplyDelete